Whether the default button color of WooCommerce doesn’t match your Website design or brand identity, changing the button color is always a good practice to correlate the items.
Meanwhile, even a tiny change in the product page can influence a consumer’s buying decision.
For example, changing the button text “out of stock” in Woocommerce to “arriving soon” will initiate the reader to keep visiting the site for updates.
This is how; you can significantly impact your conversions too.
So, without further ado, let’s dive deeper and find out how to customize buttons in woocommerce.
We all know the color scheme of a website plays a significant part in grabbing user attention by propagating user feelings.
The same goes for the woocommerce button color.
- It will help increase your website’s conversions as each color represents certain customer feelings.
- Meanwhile, choosing contrasting colors with your website instead of default will help you quickly draw customer attention as they differ from the background color. It would initiate the user to take action.
So, if you want to change the color of woocommerce buttons, all you need is to stick with us till the end, and we will walk you through the process.
Easy Ways to Change the WooCommerce Button Color:
There can be several reasons to change the woocommerce button color. However, customizing the add to cart button to your desired color will always be worth doing practice.
And here, we will show you how to change the woo commerce add-to-cart button background color.
So, without further ado, let’s customize it to the color you want
Using custom CSS:
The first and foremost method to change your woocommerce button color is by using custom CSS code.
It is also one of the easiest methods to change the button’s background color. All you need is;
- Login to your WordPress Dashboard.
- Go to the Appearance section from the left side panel.
- Next, get access to customize and additional CSS.
- Here you need to enter the below-mentioned codes, and you are all done.
However, you must know there are certain circumstances under which you can customize the button in your desired color.
For example, if you want to change the background and button color for a single product page, follow this code.
.woocommerce #content input.button.alt, .woocommerce #respond input#submit.alt, .woocommerce a.button.alt, .woocommerce button.button.alt, .woocommerce input.button.alt, .woocommerce-page #content input.button.alt, .woocommerce-page #respond input#submit.alt, .woocommerce-page a.button.alt, .woocommerce-page button.button.alt, .woocommerce-page input.button.alt {background: green !important;box-shadow: none;text-shadow: transparent !important;color:white !important;border-color:green !important;}Meanwhile, if you want to change the woocommerce background or button color when you hover over it, follow this code instead.
.woocommerce #content input.button.alt:hover, .woocommerce #respond input#submit.alt:hover, .woocommerce a.button.alt:hover, .woocommerce button.button.alt:hover, .woocommerce input.button.alt:hover, .woocommerce-page #content input.button.alt:hover, .woocommerce-page #respond input#submit.alt:hover, .woocommerce-page a.button.alt:hover, .woocommerce-page button.button.alt:hover, .woocommerce-page input.button.alt:hover {background:green !important;background-color:green !important;color:white !important;text-shadow: transparent !important;box-shadow: none;border-color:green !important;}However, you must follow these codes to save yourself from the hassle of doing again or optimizing all the woocommerce button pages.
To change the background and border color;
.woocommerce #content input.button, .woocommerce #respond input#submit, .woocommerce a.button, .woocommerce button.button, .woocommerce input.button, .woocommerce-page #content input.button, .woocommerce-page #respond input#submit, .woocommerce-page a.button, .woocommerce-page button.button, .woocommerce-page input.button {background: green !important;color:white !important;text-shadow: transparent !important;border-color:green !important;}To change the hover color on all woocommerce pages;
.woocommerce #content input.button:hover, .woocommerce #respond input#submit:hover, .woocommerce a.button:hover, .woocommerce button.button:hover, .woocommerce input.button:hover, .woocommerce-page #content input.button:hover, .woocommerce-page #respond input#submit:hover, .woocommerce-page a.button:hover, .woocommerce-page button.button:hover, .woocommerce-page input.button:hover {background:green !important;background-color:green !important;color:white !important;text-shadow: transparent !important;box-shadow: none;border-color:green !important;}After that, you must preview the changes to see how it looks. Once you are satisfied with the results, click to save and update changes, and you’re all done.
Good to know: Now you will see that all button colors will be changed to green. However, if you want to use any other color instead of green, you only need to replace the “background: green ! important” code from green with your desired color.
Using inspect element:
Another effortless way to customize the woocommerce button color is by using inspect element.
And for this, all you need is;
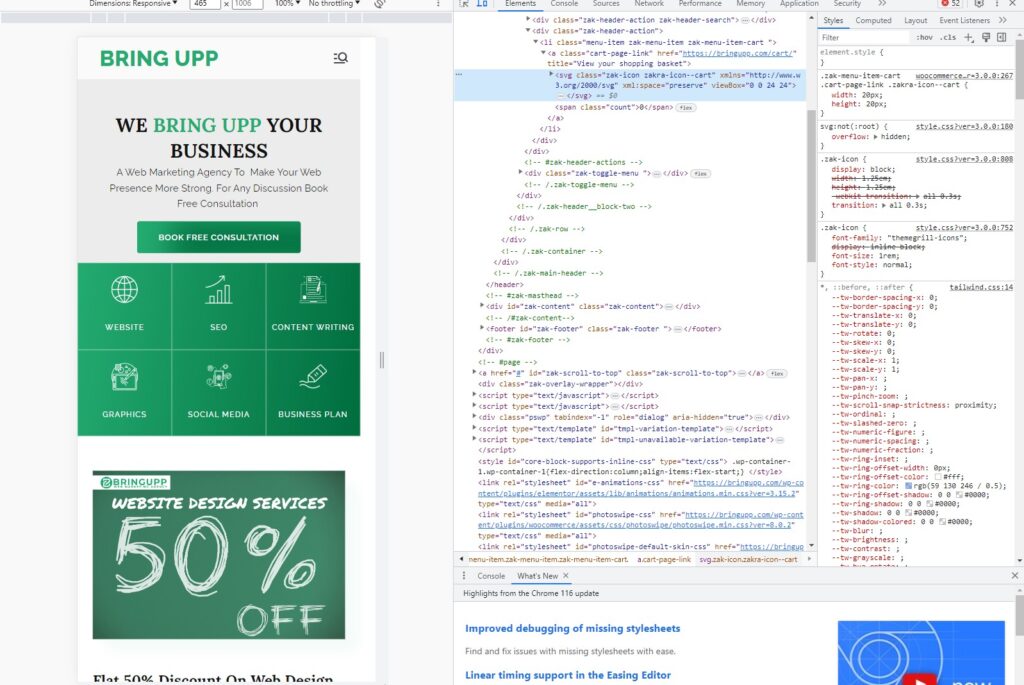
- Open your website in a browser and right-click the “add to cart” button.
- A tiny window will appear where you must select “inspect element” to see the desired HTML and CSS code behind that button.
- Next, you must copy those classes and move on to the next step.
- Login to your WordPress dashboard, and go to Appearance> Customize> Additional CSS.
- Now, paste the code right there and start a bit of customization.
- Firstly, place a “.” before every class and change the background text color to your desired one.

That’s it! Before you hit publish button, remember to preview the changes.
Good to know: As mentioned above, the method will only change the button color of a single product or page. It’s because we were on a specific page while inspecting the code element.
Using these options:
Another way to change button color in Woocommerce is by using theme options.
However, different WordPress themes are available and every piece is supporting specific built-in options. Meanwhile, the process would remain the same for any free or premium theme.
For example;
- Once you have installed and activated the plugin.
- Next, you need to navigate through the Appearance > Customize > General > Buttons sections.
- That’s it; here, a bunch of customization options will appear.
- Whether you change the background color, font size, hover color, or text is up to you.
Good to know: You don’t need to preview your changes to see how it looks; you will see a live preview on the right side. Once you are satisfied, publish and save the changes.
Using a plugin:
It’s impossible to face a problem in WordPress, and you won’t meet a plugin to resolve it. This differentiates it from other CMS like Shopify, Wix, or Webflow.
Meanwhile, it can also be your go-to choice if your WordPress theme or version doesn’t support customization. That’s why you can use a third-party source to do so. However, using a nulled or pirated version of a plugin is never recommended.
For this purpose, we recommend using a plugin named “SiteOrigin CSS.”

- Install and activate the plugin from the Plugins section.
- Next, go to the appearance section from the left side panel and get access to custom CSS.
- A live editor will open, where you will get many customization options.
- For example, to change the background color, click on the decoration option from the menu at the top.
- Now, adjust the button sizing, coloring, padding, and many more.
And you are all done; save and update the changes to see the final results.
Ready to Customize Add to Cart Button?
In conclusion, performing these types of little actions – For example, turning off the woocommerce product zoom or changing the add to cart button color or text would ultimately help you to make your woocommerce store more user-friendly and attractive.
And for this, we had stated the ultimate ways to change woocommerce buttons in the WordPress customizer.
Hopefully, this guide has created some value in yours. Still, have you got any more queries? Do write in the comment section.
Till Next!
- Best Visual CSS Live Editor Plugins for WordPress (2025 Update) - September 9, 2025
- Benefits Of Improving Your Web Design (2025 Updated Guide) - September 9, 2025
- How to Add Custom Fonts in Elementor Free | 3 Step Guide Using a Plugin|(2025 update) - September 8, 2025


