
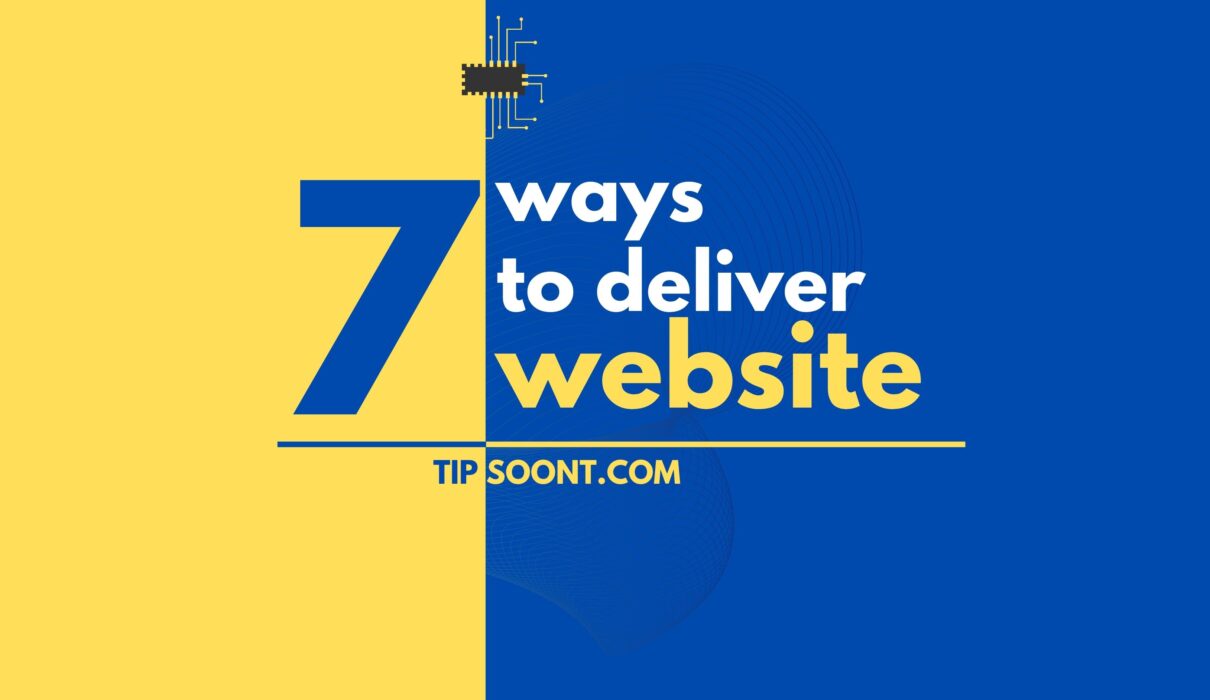
What do you do when you’re done designing an amazing whole website using WordPress main question is How to deliver website to clients and make your relationship with clients more satisfying. Share this post to make someone’s life easy with properly sized images.
I’ll try to raise Some points used to satisfy your clients and secure permanent clients as we know returning clients have Huge importance in a freelance career.
Checklist Before Hand Over a Website to the Client?
Everybody wants to satisfy the client and wants to avoid giving him revisions again and again. Before digging into how to deliver a WordPress website to a client here are my recommendations for things you should check before you hand over a website to a client for a pleasant experience.

- There should be no grammar or spelling mistakes.
- Analyze whether you had mentioned a clear and enough call to action or not (it must be in moderation).
- Check whether all the images are properly sized or not.
- Check out the social media share button, whether they are working fine or not.
- Before delivering the website to a client, always consider the client’s requirements and whether the website meets his needs or not.
- Website color schemes play a significant role in branding. That’s why you need to cross-check that there must be coherence in your design.
- Ensure the website works fine on all smart devices (mobile phones, tablets, desktops).
Considering all these points would save you from future headaches, and your client would be satisfied as you deliver what he needs. That’s why double-check all the necessary steps just before pushing the send button.
Importance of Delivering WordPress Website to Client
Here we are going to explore why delivering a website to the client is important because this marks the successful culmination of your project and fulfills the client’s initial goals for their online presence.
A happy client is more likely to recommend your services and collaborate on future projects. These recommendations can play a crucial role in your business growth & you can scale it to new heights.
Deliver WordPress Website to a Client
I think you should follow these simple steps if you want to deliver a website to your client. I am sure, you will learn a lot of new and amazing points and hacks all right.
Let’s just get started with number one.
1- Custom Login Experience
I’ve also been getting this question on social media and meetings, and I am here with an amazing Solution to design a custom. The login page and Dashboard help to manage the data very easily and the User interface is also attractive now let’s start with How to customize the login experience.
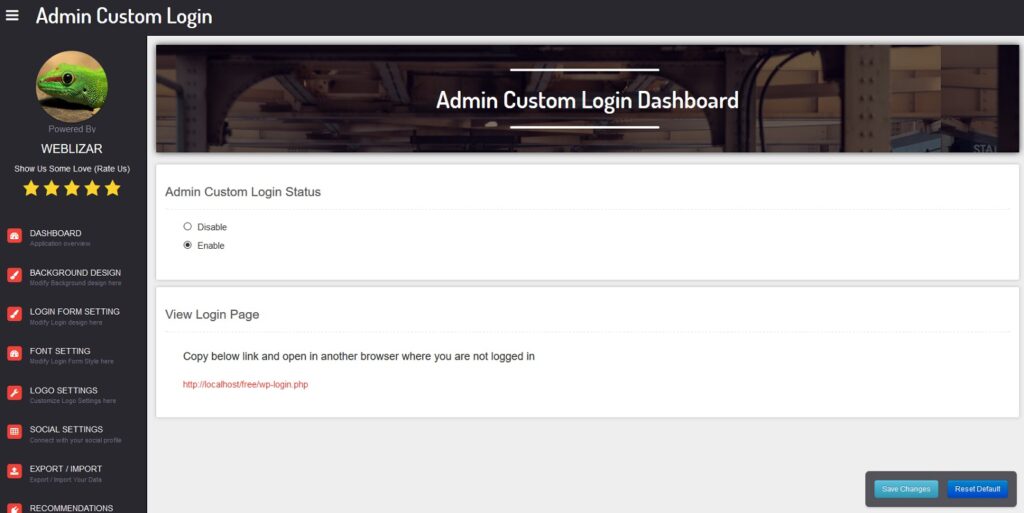
After customization, When you log in you’ll see your logo on the left side of the dashboard, and also when you log out or when somebody logs in you can see your logo. You can do it using a plugin. The plugin that we’re
going to use for this is called White Label CMS.
After installation of the Plugin Go to settings and start to configure it.
You need to set up your logo in two places.
First of all, you
In this plugin, you can Set up Logos for the Login Page and Dashboard and also background easily.
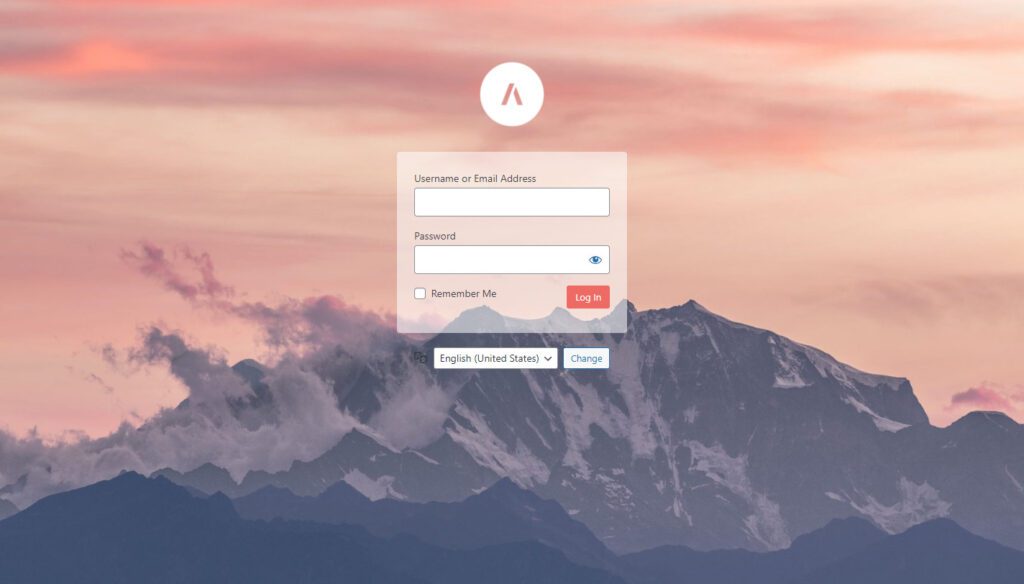
And here, you can see the logo. So, now every time you log in, you will see the logo.
TIP: Use PNG image with High. Quality to Make Background Transparent You can use a site to make the logo transparent.
You can see the website is attractive easy to use and professional now your client will be amazed to see the user-friendly environment of the dashboard.
2- Google Site Kit
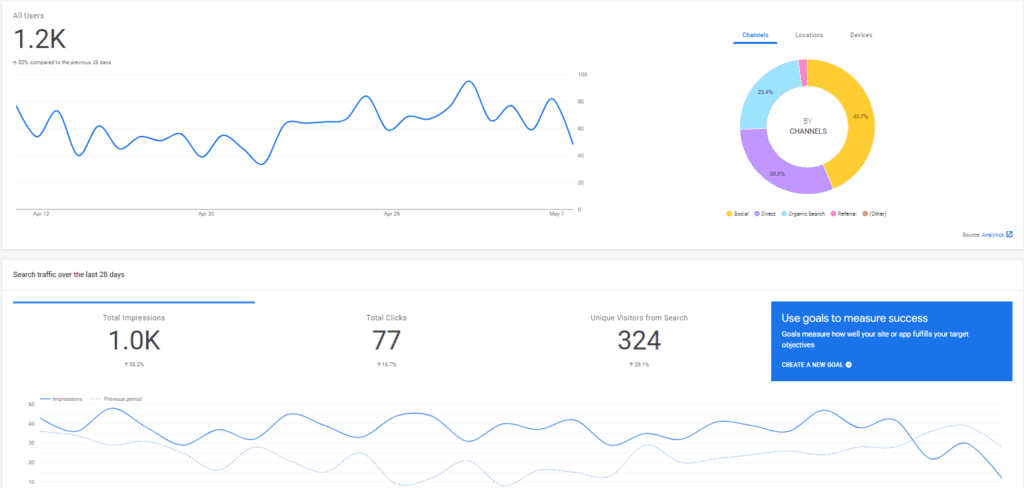
After designing a blog, the next most essential thing is to measure the website traffic progress, page speed, visitors, etc. To provide these amazing Services google Laoucnh all in one Plugin named Google Site Kit.
Google Site Kit is an official plugin from Google that helps us to connect our site with different Services and to get the benefits of Google Analytics, Page Speed Insight, Adsense, and different add-ons, etc.
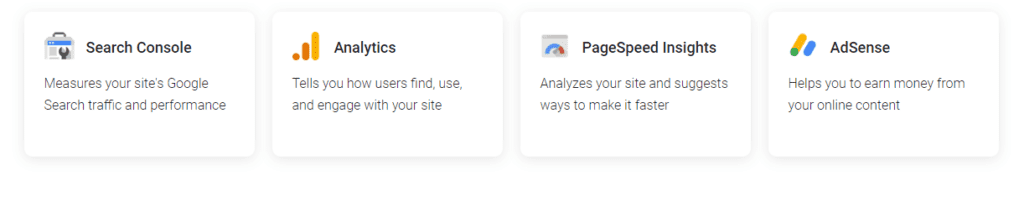
You just have to install the plugin and then Just configure all the services one by one. In the left bar just click on the Google site kit then the dashboard will appear here you can Click on Connect Services using your Gmail and this plugin will automatically connect your site from the backend also. just connect all services one by one you can use Google Analytics to get data about the visitor’s same Google Search Console is used to manage the pages and URLs of the website
Create sitemap.xml for your client using SEO plugins and submit it in the search console. We’ll discuss all the site maps and submissions in another blog post So subscribe to the Notification of the website to get it touch
With the help of this plugin, you can see the Number of Visitors with minimal data on—the dashboard as Shown in the image.
Install it for your client is not much time-consuming task but it’ll create an impressive Impression on you
3- Design Site Icon
you are reading this article on TIPsoont Just saw the top Browser’s Tabs you can see a small logo of TIPsoont like a sparrow in a black color called site Icon or Favicon. it gives an amazing and professional look to the website and most websites are using this option.
so if you want to research information on that it’s called the Fav so F-A-V. But right now, it’s
called Site Icon and that is that little icon that you can see in all of the tabs over here.
So, let’s just set this up for this website right now. You can do that by going to appearance and then clicking on customize.
And then, you need to search for a tab called site identity. If you have a different theme, then sometimes it’s hidden in some of the tabs over here.
Sometimes it’s inside of the header or inside of the style.
So, you need to click on a few tabs to find the site identity then scroll down and see the Site Icon over here. So, you can now scroll down and then select the Site Icon.
TIP: For the Site Icon, make sure that it’s not white because it’s going to be on a white or almost white background in most cases. And you also want to make sure that there is enough spacing on the left and the right otherwise, you will have problems with the cropping, right?
So, if you just drag and drop on the uploading pop-up screen you can see a preview over here
If you click on skip cropping, and click on publish, After this publishing, it’s changed from the WordPress icon to now my Site Icon.
So, this is for the whole website and now we’re done with this step.
The idea is to have a logo but some websites are to use a logo due to their topic you can use a site favicon to generate an icon for your website it makes the look of our website very professional.
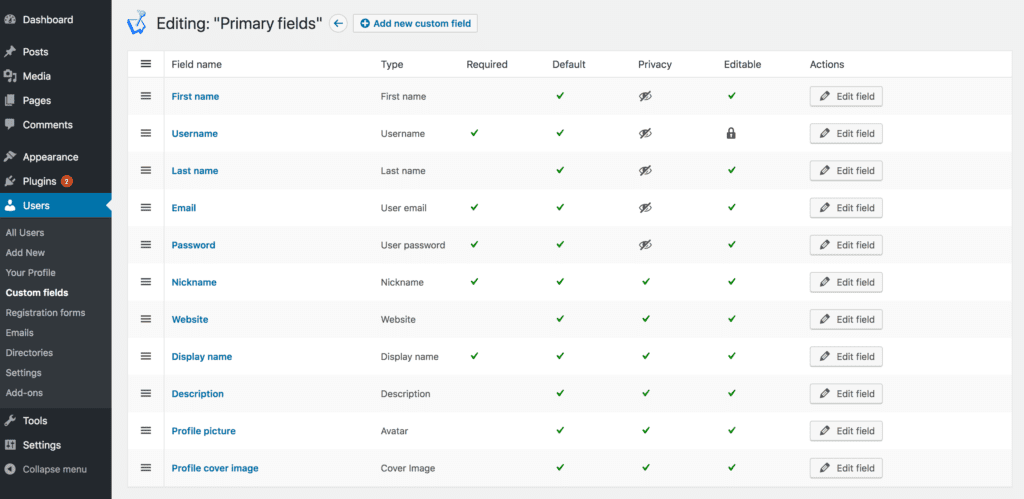
4- User Role Management of the website
Most clients want to be able to Log in themselves and make simple changes to the text and to the images. But you don’t want them to change everything about the website.
So, WordPress has a great system for this and that is called user roles. Elementor also uses those user roles, You can go to the User section in Element or tab and Select the role of the user normally and the same In the Left dashboard find a Section of the user
How to create a user for your client because you should never share your login details just for safety reasons and most clients don’t know about the deep pockets of website the that can unconsciously interrupt the website you can assign a role with limited Options.
So, if you go to the user’s section in the left sidebar of the dashboard,
You can click on add new over here and here you can add a user for your client.
Just put a front name, it doesn’t matter it doesn’t have to be a very difficult name. You need to put in their email because they will get an email from WordPress when you add them as a user, but also if they want to change their password. So, you only need to fill in the user name and the email.
Then you can scroll down and put them in the editor role. And that is one role below the admin role, which is the highest. But I have to say that sometimes your client wants full access to the whole website and then you can add them as an admin.
But I would say for most clients just give them the editor role because you don’t want your clients to touch things that they shouldn’t touch.
So, just click on add a new user, and then they will get an email. So, that’s all you need to know for this step
Elementor user roles.
This is very important because Elementor doesn’t know that we have just created a new user inside of WordPress. Elementor cannot read everything in WordPress. So, you need to tell Elementor that you want to give the editor role limited access to all of the Elementor features.
So, if you go to Elementor, if you have Elementor Pro, you can go to the role manager.
And if you don’t have Elementor Pro then this option is not available.
In the editor’s role of an element the only thing that they can do, for example, is to change the icon, which is to change the text.
But they cannot change the margin, paddings, or add in new elements. So, that is a feature that recommends you use
5- User Interface Customization
If you go to the plugins and click on add new and search for this plugin, WP Admin UI Customize, you can see this plugin.
I use it on all of my websites and this is because of the User-friendly environment and support

So, what this allows you is to limit what your client can see inside of WordPress because normally my client can see all of these things.
let’s say, that I only want my clients to be able to see the pages and maybe not even the comments and the media, right? Or even the ExactMetrics report. Maybe you want to only give him a preview on the dashboard.
So, let me show you what I mean. If you go to the plugin and then click on the option, you need to select what role you want to edit. It’s a little bit clunky I would say. It’s not a perfect plugin but it works. But the technique is very good
so if you check the box and then click on save then you can go to the sidebar now we can edit the sidebar of all the people that have an editor account within this WordPress website.
So, I think this is an excellent plugin to make the experience for your clients better.
6- Explainer video about the website
What I always do when the client needs to fill in their content is I make an explainer video on how to use the website.
Very nice for your client. But for most clients, it’s still a little bit hard. So, what I always do is just record my screen using ScreenFlow QuickTime etc.
And there’s a great tool called Loom that’s free. Where you can record your screen and your microphone at the same time But that is something that your client will appreciate.
I’ve done it with almost all of my projects Make it super easy for clients and give your client a little bit of confidence that they can make the simple changes to a website.
How they can add portfolio items, how they can add blog posts, and where they can see the analytics, right?
So, this is just something that I always do and your clients will love this because they will not feel lost.
This is very important because if your client has a pleasant experience in the last few weeks that they work with you, they are going to tell other people about you. So, ensure you don’t forget them after the website is done. Tell them what they can do with it and they will be very happy with you.
you can put videos on YouTube and I send them an unlisted YouTube link.
7- Document file of the website’s data
After all, just create a Document File with a Complete Explanation of the Website and features the main point is to add all universal images like logos and Flyers, etc with colors Hex Code with the Help of this client can design new pages and Images by choosing the Same Colours to carry the momentum forward Very amazing It is in my day to day experience
A lot of steps we can add here but in the Next post If you want to add just write it down in the comment if you want to learn about WordPress Websites then visit our blogs related to WordPress
FAQ About Deliver a Website to Client
Well, it’s so simple. All you need to do is ask your client to buy a domain and the best hosting for the website. And once you are done with creating a website, share the login details with your client.
Simple as that! Don’t forget to check out our list of best freelancing websites
Often, freelancers consider that once they deliver website to clients, they have nothing to do further. In reality, you can offer a maintenance service or other services related to his website. Most importantly, if you deliver quality work, he will get back to you and refer you to others.
So, always strive for quality, and don’t forget any step while creating a website.
You often hear it depends, right? But here is our clear guideline for what we recommend to charge as a freelance web designer or a web developer.
First, analyze how many hours it would take you to build a site and how much expertise you have in the relevant field. Suppose you have little or no experience; we recommend getting 2x of your working hours.
Most importantly, figure out all the queries you have in mind with client requirements and whether you would offer any extra revision or service. Once you get the answer to all your concerns, it will be much easier for you to decide how much you should charge.
You May Like:
How to make a WordPress Website look Professional OR How to create a Bank Website with WordPress
For suggestions and reviews, you can also visit the Contact US page.

- Top 20 Trusted Online Earning Sites With Skill And Without Skill in 2025 - March 1, 2025
- 50% OFF on WordPress Website Design Services: Get Your Website for Just $199 - January 4, 2025
- Top 6 Web Developer Soft Skills & Hard Skills in 2024 - December 18, 2024


2 Comments