
Are you a WordPress Designer and Developer? I can understand the Lack of hands-on experience issue, especially for Beginners to create a website and spend some money to buy essentials for the website.
Xampp, Localhost, etc. are some Common words that make your WordPress Practice very Professional and Easy to do. But How. Let’s start it and Make it a Little Easier
First, we’ll Discuss what is Xampp and Local Host
What is XAMPP
XAMPP is a Software used to make our System work as a Server using MYSQL and Apache. After using this software you can create a website and Install WordPress using your Hardware as hosting without any demand for an Internet Connection.
That’s why Using Xampp for WordPress is also known as a local WordPress installation. No one can access your Website Just user can Use it on a single Computer Machine and an Internet Browser Like Google Chrome
In this post, we will discuss How to use Xampp and How to Install WordPress locally step by step.
For the video format you can Scroll down and watch the video too : )
Prerequisites of Xampp server
Prerequisites. XAMPP requires only one zip, tar, 7z, or exe file to be downloaded and run, and little or no configuration of the various components that make up the webserver is required. The Windows version of XAMPP requires Microsoft Visual C++ 2017 Redistributable.
Why we should Use WordPress Locally on Xampp
If you are a Fresh freelancer and new to WordPress and Website design you have to design some Websites as Your Portfolio so you can use them for free On the Other hand, you can Design here easily and transfer your Website to live Hosting.
How to install Xampp For a Practice Website
To Install WordPress on Xampp you have to download the Installer According to your operating system(OS) from the xampp’s site as mentioned in the image below
Click here to install the XAMPP Server installer
You just Have to Select your Operating system like Windows Mac OS then your Installation will start automatically
When the file is done just Start it Up and Follow the Next Steps Mentioned in the Pictures below
First, you have to download the XAMPP to download XAMPP Click Here and Follow the Steps Given Below
1 Select your Operating System Like Windows Mac etc.

2 Just Open the Downloaded Files and Start installing the Software like normal Software after the Normal Steps Find the window given Below and Click on the Next
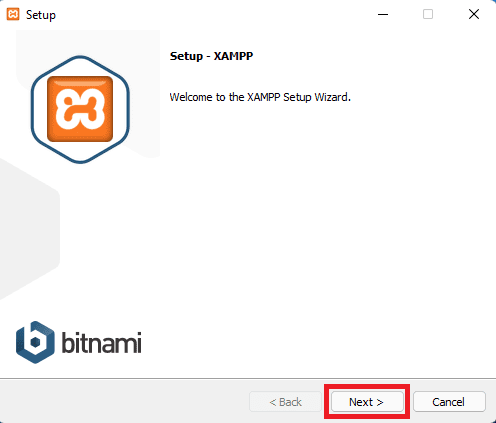
3 Just Click on Next Button
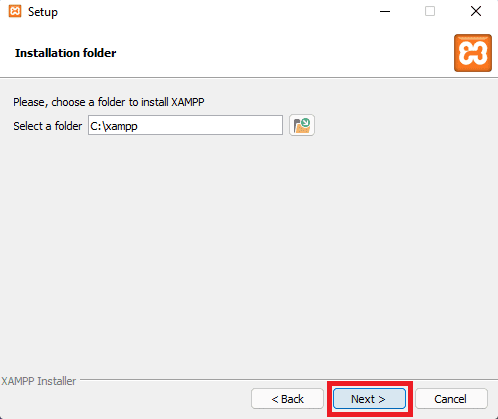
4 Select hr Storage Path Recommended In C drive So use BY Default path and Click Next.
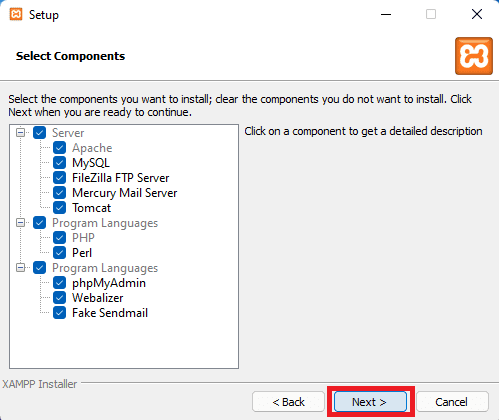
5 Just Click On Next
6 Just Click On Next
7 After clicking the Installation Will start just Wait for a Few Minutes
8 Wait for a few Minutes
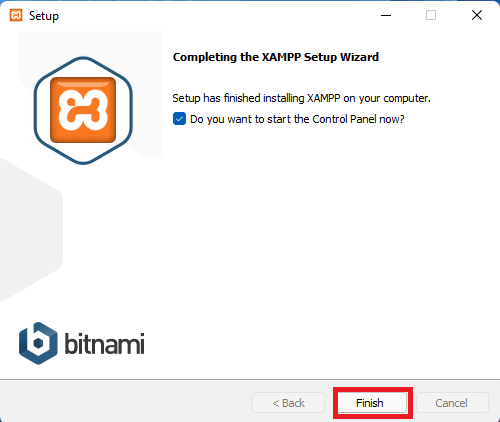
9 Click on Finish
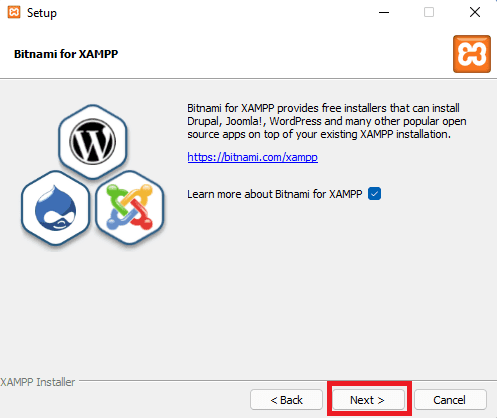
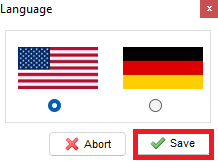
10 When you launch it same POP Up will Appear just click on Save with Language
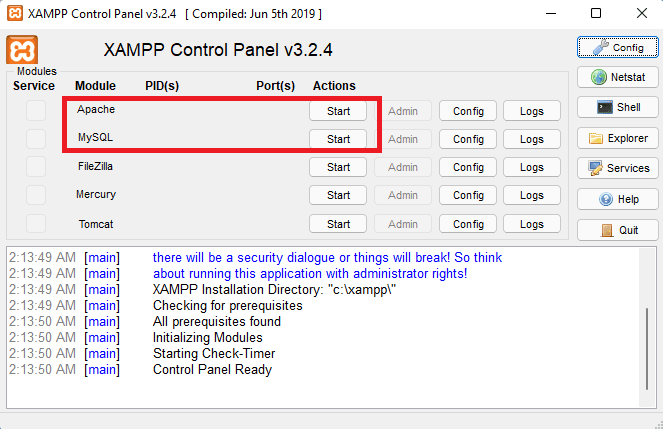
11 when You want to use the service of XAMPP just Turn On Apache and MY SQL If you want to know What is Apache and MY SQL then click here
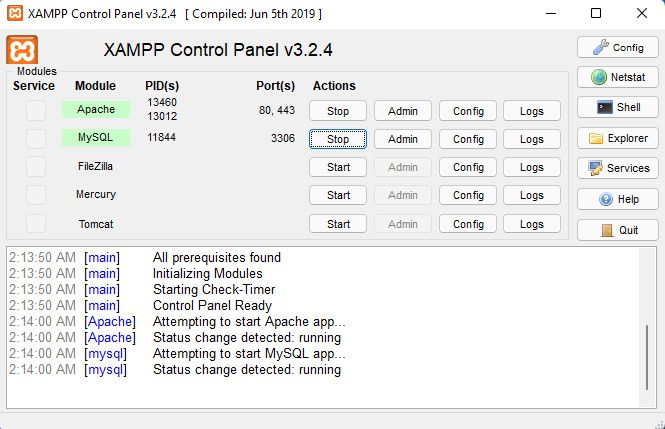
12 when It’ll Green it means That Everything Is OK both are Working Properly and if One or Both Become Red then it seems that an Error Occurs if you are facing the Issue Just Leave a comment or contact Us via Live Chat
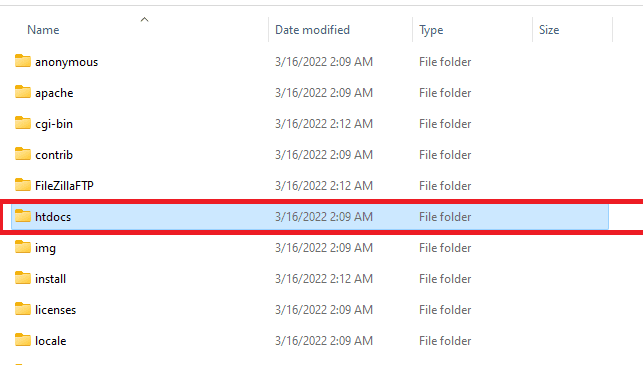
13 After this Download WordPress Files By Clicking Here and scrolling down to get the Download Button and Extract the file In the Folder of ht Docs folder available In XAMPP as in Picture and The Path of HT Docs by Default is C:\xampp

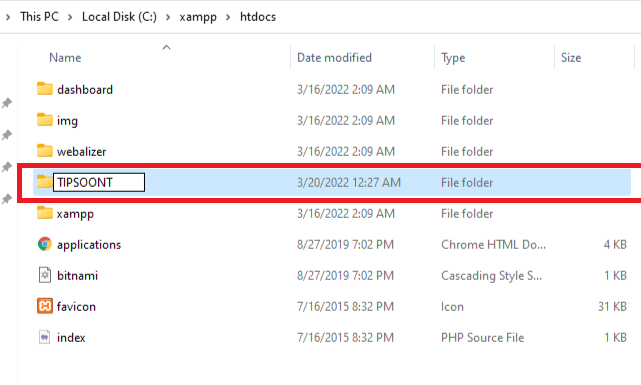
After Extracting a Folder With WordPress Files will be Created Juts Rename It with the name Of Your Site Like In My Case TIPSOONT is Site Name SO my Folder Will be Named TIPSOONT as You can See in the Images
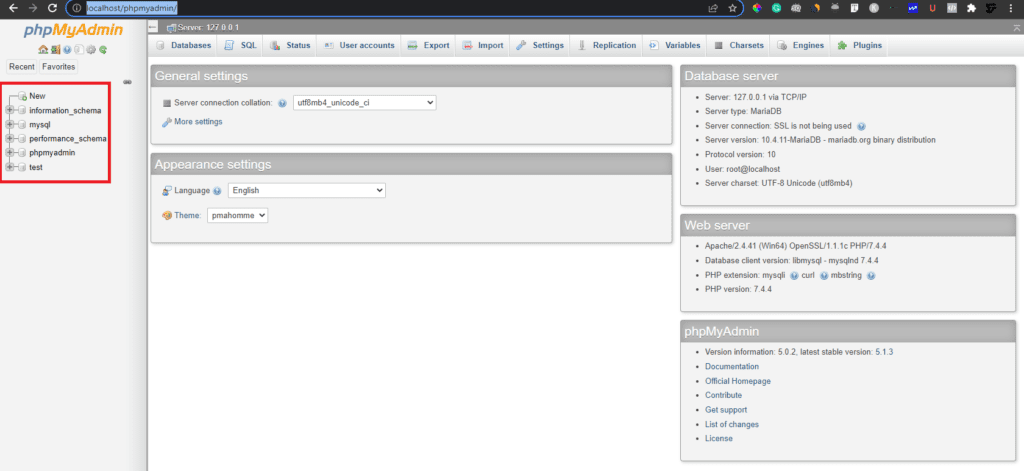
After This, we Have to create a database for Our Website using PHP my admin
Just Open Your Web Browser and type this URL http://localhost/phpmyadmin/ or Click Here to Redirect to this link After This an Interface of PHP my admin Will Appear as In the Image
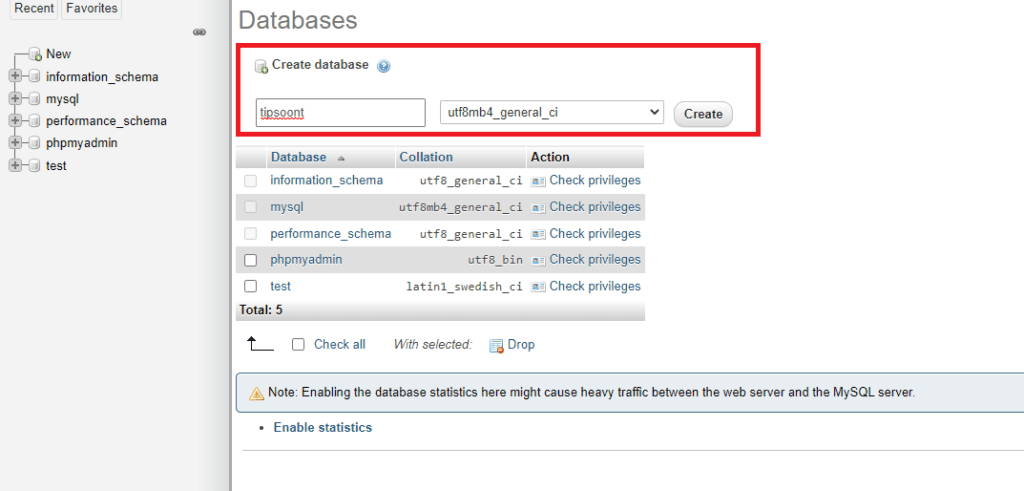
Just Click on new In the left Side Bar
Just Add the database Name (Recommended is to use the Same name In My case TIPSoont as In the Picture) and Just Click On Create
And You have Done The Database and all the Initial Steps to create a local Website just go to the new Tab and Type this Link
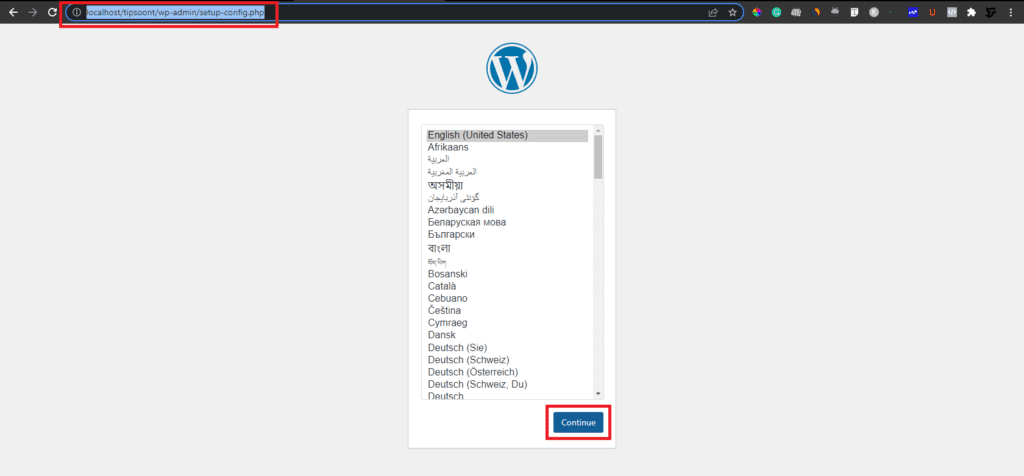
http://localhost/Folder Or the Site Name(In my Case tipsoont)/wp-admin/setup-config.php Link for My website will be
http://localhost/tipsoont/wp-admin/setup-config.php
After This main WordPress INstallation Page will Appear Just Select a Language ENGLISH Click Continue
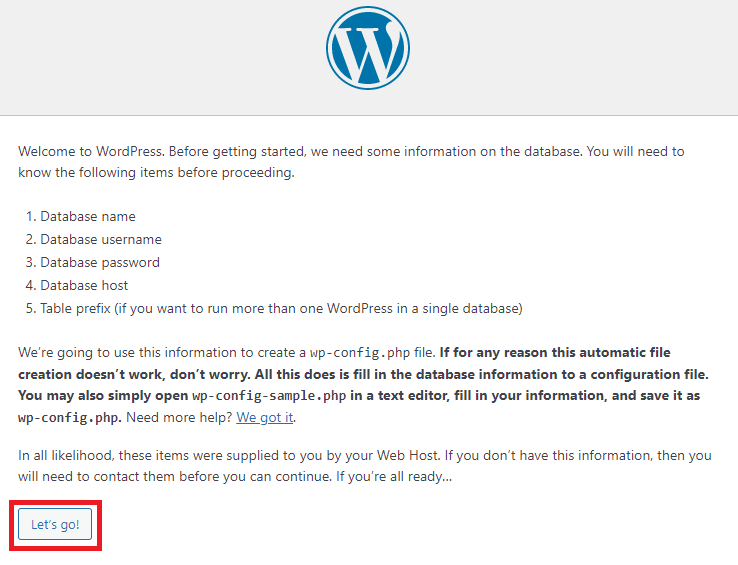
Just Click Let go
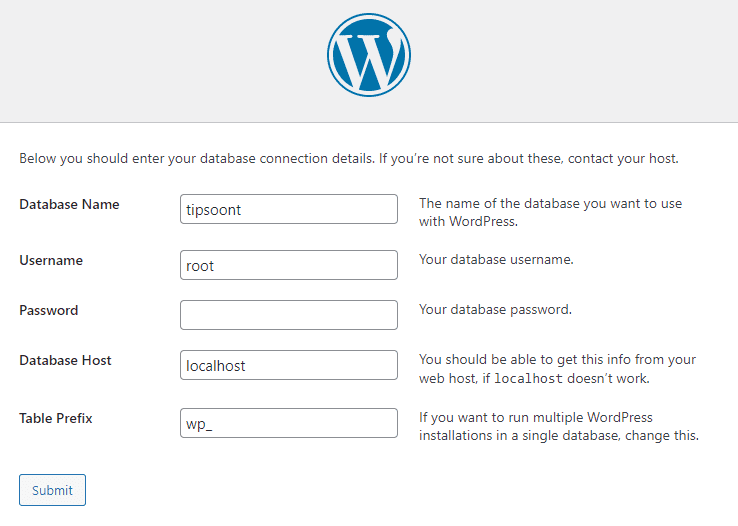
On this Page Type, your Database name and All other Blocks Will be Exactly the Same as Mentioned In the image
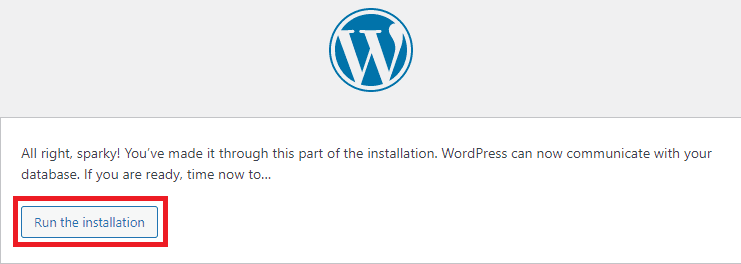
Just Click On RUN the Installation
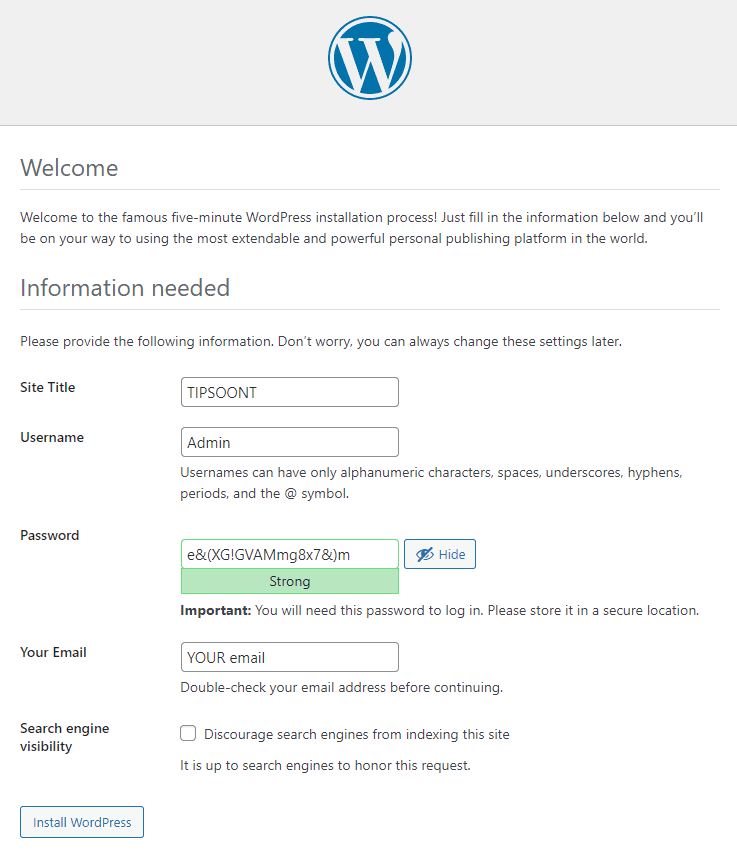
Fill in the Blanks Simply and Click On Install
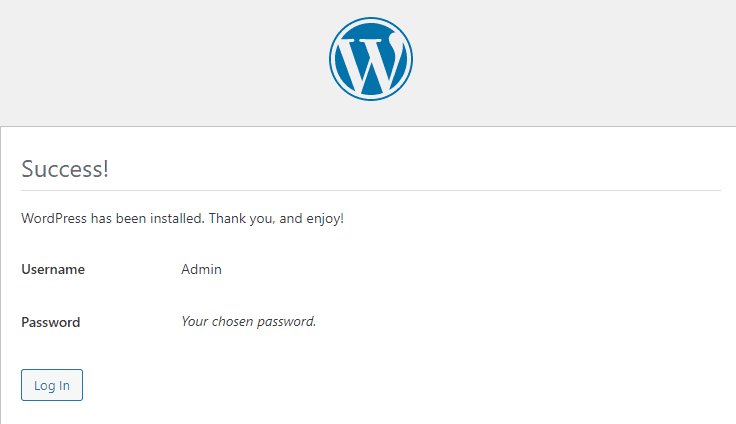
After This Click On Login
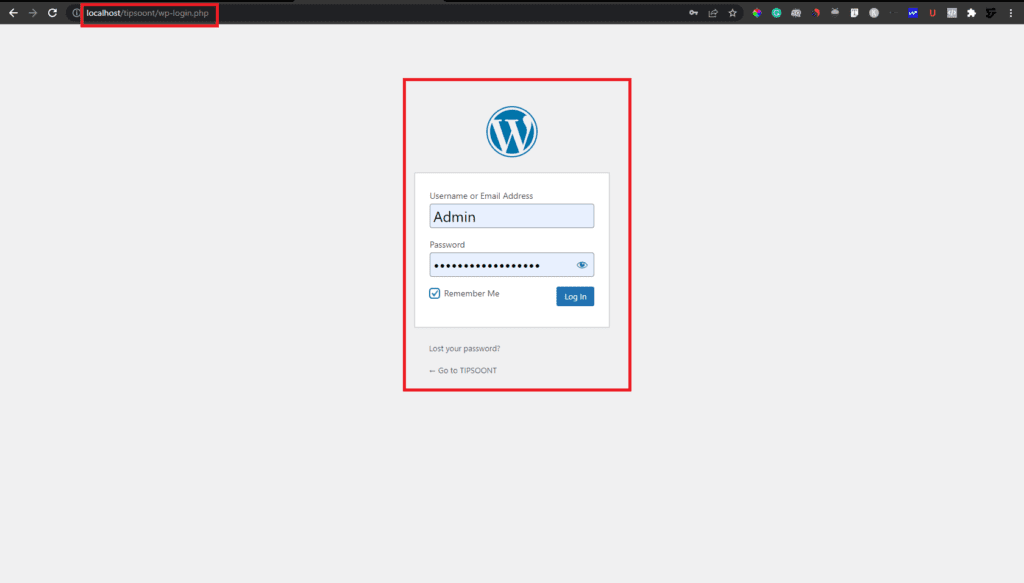
The Default Login Page of WordPress is here you can get it to write /wp-admin at the End of The URL of Every WordPress Website
Just Log in to the site
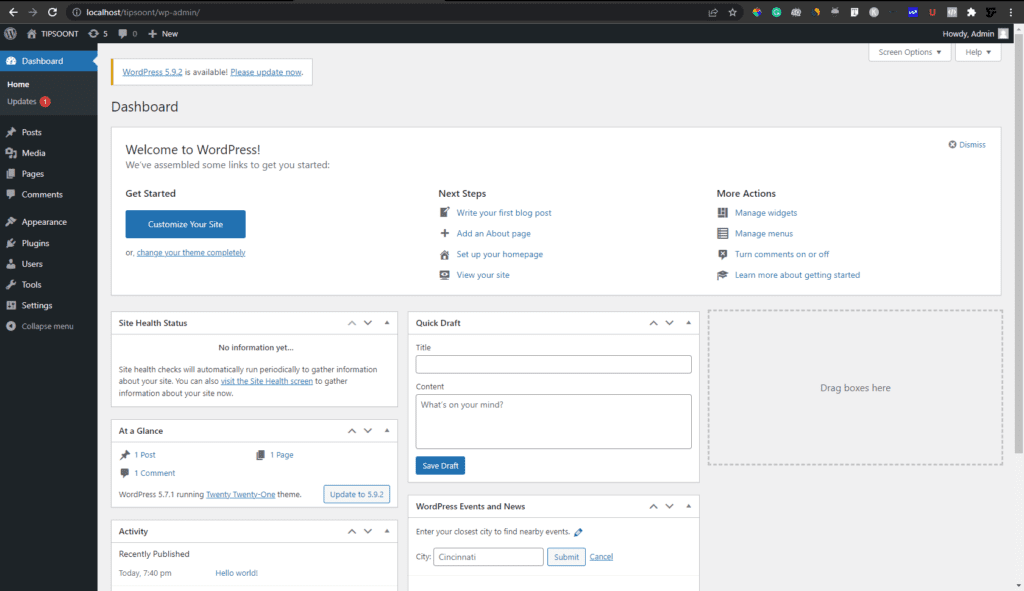
Here is Your WordPress Dashboard and Now You can Desing and Manage your Website
Now your Website is Created You Can Access your Website using the following link
http://localhost/name of Your Site/
A scratch Website is Here for You Just Start Designing and If you need Help just leave a comment or start a Live Chat
Keep in Mind all these Services will work until Apache and MySQL are Working properly whenever You want to access the website you have to open XAMPP and Start both
If You want to watch this procedure in the video then we are here. 🙂
For the Live website, there are some Basic Requirements of the website You can Read by Clicking Here, and the Best Hosting providers are also available to read click Here For any query, you can start a live chat and use the Contact Us Page By clicking Here
You May Like to Explore: How to Increase your Website Organic Traffic OR How to change website thumbnail on WordPress
Subscribe to Our News Latter for Offers and Updates.

Do Subscribe the Newsletter and Push Notification Because we'll share premium knowledge about web here for free.


13 Comments