
If you are working with any organization, you will already be aware that you have to access multiple WordPress sites.
Would you prefer logging in to each site manually?
No, nobody will……..!
That’s why, in this regard, WordPress’s most exquisite feature, single sign-on, also known as SSO, is here to help you gain access across multiple sites using single login credentials.
In today’s guide, we will discuss creating a single single-on between two WordPress sites. So, buckle up your sleeves and stick with us till the end.
What is Single Sign On Between Two WordPress Sites?
Single sign-on is also known as SSO. As the name suggests, it will enable the user to log in to multiple websites or web applications using single credentials.
However, one website will be considered primary and others as clients to make it functional.
For example, when users try to log in to a WordPress site configured for SSO, they will be redirected to the IDP. Once the user has authenticated successfully with the IDP, they will be redirected back to the WordPress site, where they will be logged in automatically.
Don’t worry; how SSO has been made and how it works will largely be a part of today’s discussion.
Just keep reading.
How Does Single Sign-On (SSO) Work in WordPress?

Before we dig into the details of making a single sign-on between two WordPress websites, it will help you get a wider and clearer understanding of things.
So, the process of SSO in WordPress remains the same, just like in Apps.
Furthermore, single sign-on (SSO) in WordPress establishes a trust relationship between WordPress and an identity provider (IDP). The IDP is a central authentication server that stores user credentials and authenticates users on behalf of other applications.
Here is a step-by-step guide to understanding how single sign-on works between two WordPress sites.
- Firstly, the user will visit a WordPress site configured for SSO and request a page to take an authentication action (Like accessing the profile page).
- WordPress will redirect the user to the IDP.
- After that, the process of user authentication with the IDP starts.
- Once completed, the IDP will redirect the user back to WordPress, along with a token that proves the user’s authentication.
- Next, WordPress will verify the token with the IDP to ensure validity.
- If the token is valid, WordPress logs the user in automatically.
Remember, there will be a lot going on behind the scenes that doesn’t need to be transparent for users.
Although the process seems straightforward, three industry-standard methods will still transfer authentication data between a client and server.
They are known as SAML, OAuth, and OpenID.
Let’s take a closer look at each.
SAML
SAML is also known as the Security Assertion Markup Language.
It is an open standard for exchanging authentication data between parties, particularly between an identity provider and a service provider. It can also be considered as an XML-based markup language for security assertions.
Here is a simplified example of how SAML works for SSO:
- The user visits a service provider application, such as Google Workspace.
- Google Workspace redirects the user to the identity provider, such as Okta.
- The user authenticates with Okta.
- Okta redirects the user back to Google Workspace with a security token.
- Google Workspace verifies the security token and logs the user in.
OAuth
OAuth (Open Authorization) is a standard for “secure delegated access” to servers.
It is the most common way to access websites without using passwords. For example, when you click on login with Google or Facebook ID, at the backend, you are using OAuth. So, you have been using it even without realizing it.
Here is a simplified example of how OAuth works:
- The user visits a third-party application, such as a social media platform.
- The application redirects the user to the user’s identity provider, such as Google or Facebook.
- The user authenticates with the identity provider.
- After that, the identity provider redirects the user back to the application with an authorization code.
- Here, the application exchanges the authorization code for an access token.
- The application uses the access token to access the user’s data from the identity provider.
OpenID
OpenID is the most effective framework for user authentication. For this purpose, OAuth2 has been used, which is commonly known as OpenID Connect.
It lets you select an IDP from a server such as Google. After that, you will be redirected to the websites after automatic login. You must remember and disclose one set of credentials, and OpenID will connect you through all sites.
Here is a simplified example of how OpenID works:
- The user clicks on an “OpenID Login” button on a website.
- The website redirects the user to their chosen IDP.
- The user authenticates with the IDP.
- The IDP redirects the user back to the website with a token that proves the user’s authentication.
- The website verifies the token with the IDP to ensure validity.
- If the token is valid, the website logs the user in automatically.
WordPress Plugins For Single Sign-On
Different WordPress Plugins can be used for Single Sign-On between two WordPress Sites.
However, there are several secure and best options that you can go for.
miniOrange WordPress Single Sign On
If you are looking for a plugin with various SSO protocols to enhance user experience, miniOrange is your choice. miniOragne offers a wide range of SSO solutions for businesses of all sizes.
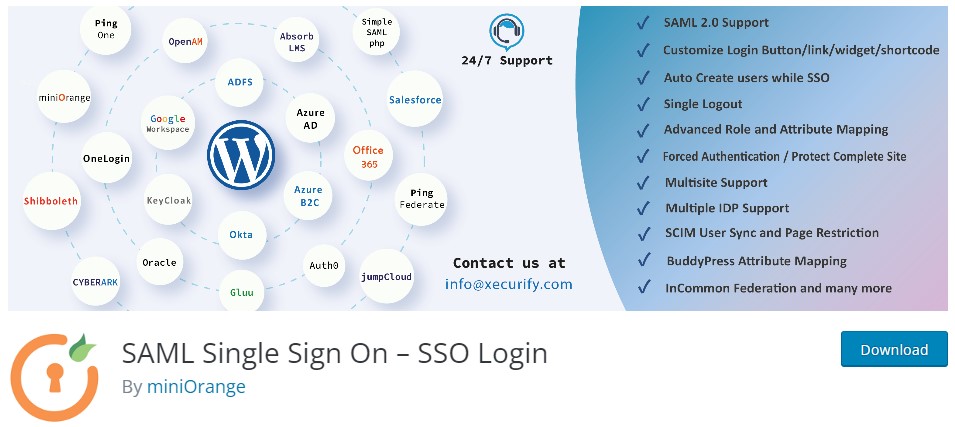
It supports multiple SSO protocols, including SAML, OAuth, and OpenID Connect.
To use miniOrange WordPress Single Sign On, you will need to:
- Create a miniOrange account and add your WordPress site as an application.
- Install and configure the miniOrange WordPress Single Sign On plugin on your WordPress site.
- Configure the miniOrange WordPress Single Sign On plugin to communicate with miniOrange.
- Test the SSO configuration to ensure that it is working properly.
WP-SAML SSO
WP SAML SSO is a popular plugin, and as the name suggests, SAML will be used to authenticate user data. It is a flexible plugin that supports a wide range of configuration options.

For example, you can configure the plugin to allow users to log in to WordPress sites using multiple IDPs, or you can configure the plugin to require users to authenticate with a specific IDP.
Additionally, it is a secure plugin where the two-factor authentication is there to enhance security.
To use WP-SAML SSO, you will need to:
- Install and activate the plugin on your WordPress site.
- Configure the plugin to work with your IDP.
- Enable SSO on your WordPress site.
OneLogin SAML SSO
OneLogin SAML also uses SAML to authenticate user information. This plugin will be integrated with a login identity to provide SSO.

It is a cloud-based identity and access management (IAM) platform that provides SSO, multi-factor authentication (MFA), and user provisioning for various applications.
To use OneLogin SAML 2.0 SSO, you will need to:
- Create an account with OneLogin and configure your OneLogin tenant.
- Install and configure the OneLogin SAML 2.0 SSO plugin on your WordPress site.
- Configure the OneLogin tenant and the OneLogin SAML 2.0 SSO plugin to communicate with each other.
- Test the SSO configuration to ensure that it is working properly.
Advantages and Disadvantages of SSO
So, as we have, we know how SSO works and how you can integrate it, but is it worth it?
So, let’s take a closer look at some of SSO’s key advantages and disadvantages.
Pros of Single Sign-On
Improved security
The biggest perk of using SSO is that the number of passwords you must manage will be reduced. For example, the need to enter passwords on multiple sites will be reduced. As a result, it can help you to reduce the risk of password phishing and other security attacks.
Reduced password fatigue
Undoubtedly, it’s hectic to memorize many passwords. So, SSO can reduce password fatigue by requiring users only to remember a single password. On the contrary, this will also let you choose a strong password as you need to remember only one.
Improved user experience
User experience is the most critical part while determining the effectiveness, and SSO is a lifesaver by making it easier for users to log in to multiple websites. You no longer need to remember long passwords and multiple usernames. You can even log in without the need to type a password using OAuth.
Increased administrative efficiency
SSO can increase administrative efficiency by centralizing user management. IT administrators can manage all of their users from a single location, saving time and reducing the risk of errors.
Reduced IT costs
It can also reduce IT costs by eliminating the need to manage multiple password databases and reducing password-related support tickets.
Enhanced collaboration
Additionally, SSO can enhance collaboration by making it easier for users to share resources and applications. You can log in to multiple applications with a single set of credentials, which can help to streamline workflows and improve productivity.
Cons of Single Sign-On:
Single point of failure
However, SSO helps in multiple ways and will reduce the task of memorizing multiple passwords. However, it can also be a single point of failure. For example, if an IDP is been used for authentication, if it becomes unavailable, you will not be able to log in to all other sites protected by IDP.
Increased complexity of implementation and management
Yes, it is hard to implement and manage SSO. You need a technical team to manage and implement SSO solutions properly. That’s why, if a large organization is planning to implement SSO, you must know the proper resources and skills to manage the system effectively.
Can be expensive
SSO can be expensive, especially for large organizations. The cost of the SSO solution itself, as well as the cost of implementation and management, can be significant.
It can be difficult to troubleshoot
Another big drawback of SSO is that it’s difficult to troubleshoot. For example, if there is any problem with the IDP and application, it will be hard to spot the cause and find a solution.
It may not be compatible with all applications
Do you know that not all applications are not compatible with SSO? IT administrators need to check the compatibility of each application before implementing SSO.
Conclusion
To conclude, using SSO is common for large-scale organizations; to get it done, you must be very careful or hire an expert only.
If you stick with us until the end, we hope you have the information regarding Single Sign-On between two WordPress sites.
However, if you are struggling to integrate SSO in WordPress, you can freely reach out to us for a strategy.
We would love to help.
Till Next!
Do Subscribe the Newsletter and Push Notification Because we'll share premium knowledge about web here for free.
- Website vs Blog | Key Differences and Similarities - July 8, 2024
- Top 10 Commonly Used Types Of Websites - May 26, 2024
- How To Transfer Domain Name Of Website | Step By Step Guide - May 20, 2024


