Today’s Guide is How to Publish Squarespace website because Having an Online presence especially If you are a Website Owner Because Website is essential for Business now. Squarespace is one of the best CMSs for Designing a website. If You want to launch a website for Your business then this post is for You to read the Complete Post to Know the process of launching a website in 2023
If You are going to Invest in anything You should Know about the Product completely In this case product is Squarespace. Establishing a strong online presence is crucial for businesses, individuals, and organizations alike. Squarespace, a popular website builder, empowers users to create stunning and professional websites without extensive coding knowledge.
According to the Research and Figures Squarespace has 3.79 million Subscribers and The revenue of 2023 (TTM) is around 0.97B US dollars with a Change of 11.93% which is good enough. There are Around 2.96 million Live Websites using Squarespace So it’s okay to use Squarespace because It captures a Massive Number of sites.
Steps to Squarespace Website
The process of publishing a Squarespace website can seem daunting for those new to the platform. This comprehensive guide will walk you through each step of the process, ensuring a smooth and successful launch of your online presence.
Step 1: Create a Squarespace Account
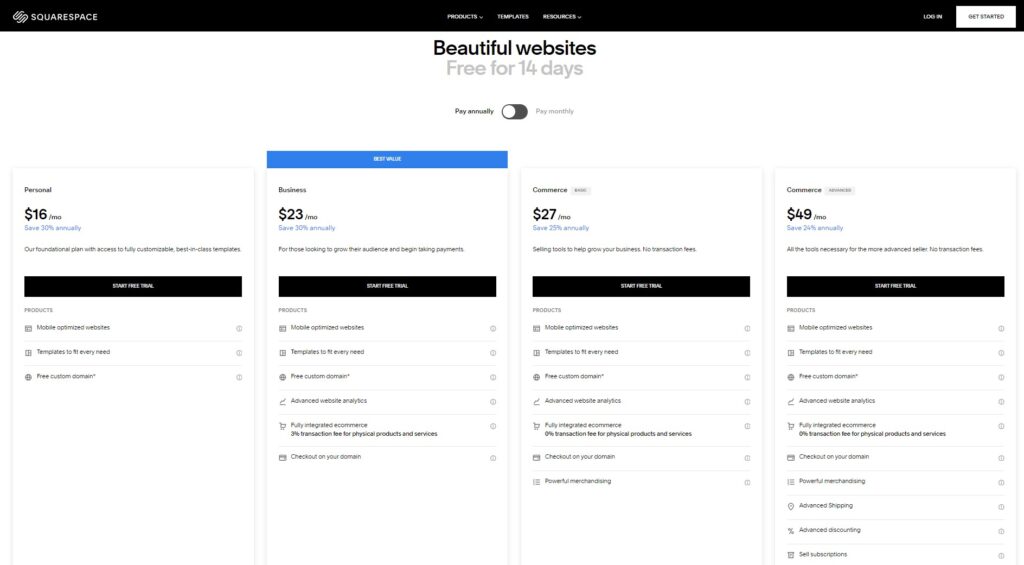
To embark on your Squarespace journey, begin by creating an account. Squarespace offers various subscription plans tailored to different needs and budgets. Explore the plans available, considering factors such as website traffic, storage requirements, and desired features. Once you’ve selected a plan, sign up for an account using your email address and create a strong password.

Step 2: Choose a Squarespace Template
Squarespace presents a diverse selection of templates, each designed to suit specific website types and industries. Whether you’re creating a personal blog, an e-commerce store, or a business website, Squarespace has a template that aligns with your vision. Browse through the template collection and select one that resonates with your brand aesthetic and desired website layout.
Step 3: Customize Your Website
With your template chosen, it’s time to personalize your website to reflect your unique brand and style. Squarespace’s intuitive interface allows for easy customization without requiring coding expertise. Use the drag-and-drop functionality to arrange and rearrange elements, adjust colors and fonts, and incorporate your brand imagery. Familiarize yourself with the various design tools and settings to fully customize your website’s appearance.
Step 4: Add Content to Your Website
Your website’s content is what informs and engages visitors. Start by creating compelling pages that outline your services, products, or personal stories. Utilize Squarespace’s rich text editor to craft engaging content, incorporating images, videos, and other multimedia elements to enhance the visual appeal and convey your message effectively.
Step 5: Connect Your Domain Name
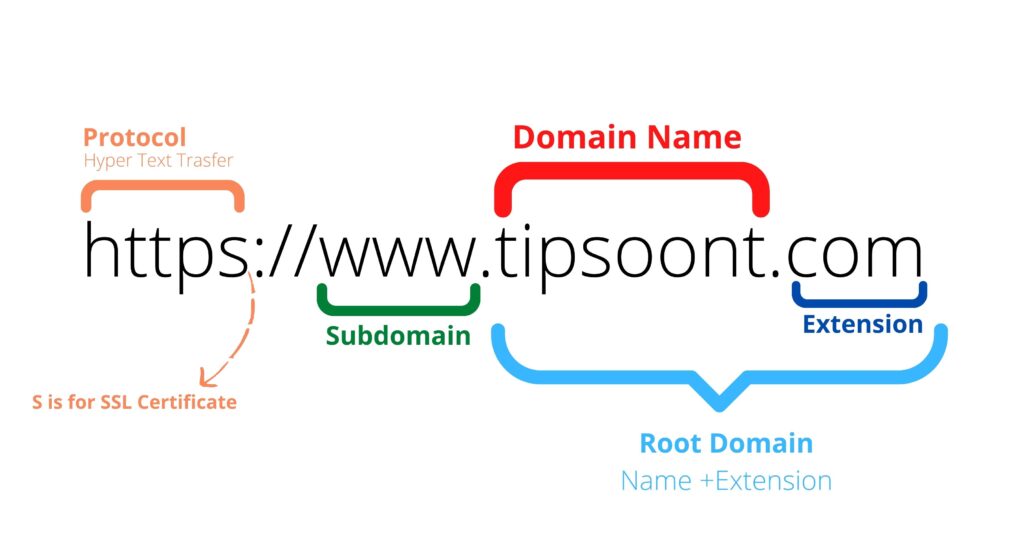
A custom domain name is essential for establishing a professional online identity. It allows visitors to easily find your website and creates a memorable brand association. If you already own a domain name, you can connect it to your Squarespace website. If not, Squarespace offers a domain registration service where you can purchase a domain name that aligns with your brand.

Step 6: Optimize Your Website for Search Engines
Search Engine Optimization (SEO) is crucial for ensuring your website appears in relevant search results, attracting organic traffic. Squarespace provides built-in SEO tools to help you optimize your website content, meta descriptions, and page titles. Additionally, consider using Squarespace’s SEO Checklist to ensure you’ve covered all essential aspects of on-page optimization.
Step 7: Test and Review Your Website
Before publishing your website, thoroughly test it across different devices and browsers to ensure consistent performance and responsiveness. Check for any broken links, formatting issues, or compatibility problems. Gather feedback from friends, family, or colleagues to identify areas for improvement.
Step 8: Publish Your Squarespace Website
Once you’re satisfied with your website’s design, content, and functionality, it’s time to publish it to the world. Click the “Publish” button in your Squarespace dashboard, and your website will go live. Congratulations on launching your online presence!
Additional Tips for a Successful Website Launch
- Promote your website on social media platforms and relevant online communities to attract visitors.
- Regularly update your website with fresh content to keep visitors engaged and improve SEO rankings.
- Monitor website analytics to gain insights into visitor behavior and identify areas for improvement.
- Respond promptly to comments and inquiries to demonstrate responsiveness and build customer relationships.
Remember, your website is an evolving entity that requires ongoing attention and maintenance. Embrace the continuous process of refinement and optimization to ensure your Squarespace website remains a powerful tool for your online success.
Conclusion
Launching your Squarespace website is a significant milestone in establishing your online presence. By following the comprehensive steps outlined in this guide, you can confidently embark on this journey, transforming your vision into a vibrant and engaging online space. Embrace the power of Squarespace to create a website that reflects your unique brand, informs your audience, and propels you towards your online goals. With dedication and continuous optimization, your Squarespace website will serve as a cornerstone for your digital success.


