When it comes to making your website super-fast, one of the biggest helpers is learning how to remove unused CSS in WordPress. Just like cleaning out a cluttered closet makes it easier to find things, cleaning up your website’s code makes it load quicker for everyone who visits. This guide will show you how to do just that, without needing extra tools that can slow things down themselves.
What Is Unused CSS and Why Does It Matter?
Imagine you’re building a house, and you order a huge pile of bricks. But then, you only use a small number of those bricks to build your house. The rest just sit there, taking up space and making it harder to move around. That’s a lot like unused CSS. CSS, which stands for Cascading Style Sheets, is the code that tells your website how to look – what colors to use, where to put text, how big images should be, and so on.
The problem is, sometimes your website loads a lot more CSS than it actually needs for the page you’re looking at. This extra, unused CSS still has to be downloaded by your visitor’s computer, even if it’s not applied to anything visible on the page. Consequently, this slows down how quickly your page can show up, especially for people using their phones. This delay can seriously impact something super important called Core Web Vitals, which Google uses to decide how good your website is. If your website is slow, it might not show up as high in search results. Specifically, it’s really important for passing the Largest Contentful Paint (LCP) part of Core Web Vitals, which measures how long it takes for the biggest piece of content on your page to appear. Therefore, learning to remove unused CSS in WordPress is a big deal for your website’s health.
Why You Should Avoid Plugin Bloat
You might think, “Well, there must be a plugin for that!” And you’d be right. There are plugins out there like Asset CleanUp or Perfmatters that can help you with cleaning up CSS. However, while these plugins can be helpful, they also add more weight to your website. Every plugin you add brings more code, and more code means your website has to work harder and slower.
On the other hand, doing things manually, or “optimizing” your website yourself, is often better for a really lean and fast performance. When you use fewer plugins, your website’s “Time To First Byte” (TTFB) gets faster. This is the time it takes for your server to send the very first piece of information to the visitor’s browser. A faster TTFB means your site starts loading quicker, which is a fantastic first impression. Therefore, when you remove unused CSS in WordPress without plugins, you’re building a stronger, faster foundation.
Method 1 – Manual CSS Audit (Beginner-Friendly)
This method is like taking a careful look at your own code. It might sound scary, but it’s really about being a detective and finding what’s not needed. You’ll be surprised how much you can learn about your website this way!
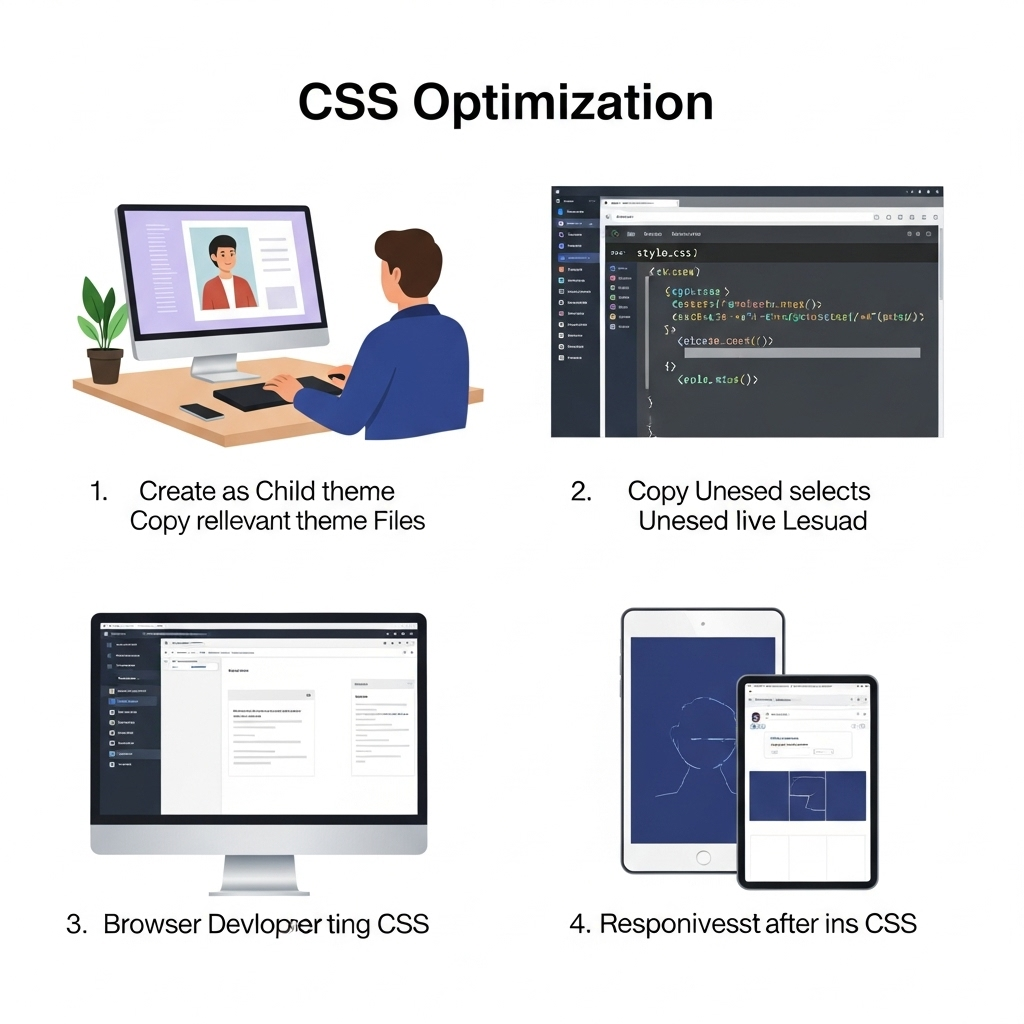
Step 1: Copy theme files to child theme
First things first, it’s super important to work safely. You should never, ever make direct changes to your main theme files. If your theme gets updated, all your changes will disappear! Instead, you need to use something called a “child theme.” Think of a child theme as a safe little sandbox where you can play and make changes without breaking your main theme. If you don’t have a child theme set up, there are many guides online that can help you create one. Once you have it, you’ll copy the files you want to change from your main theme to your child theme.
Step 2: Open style.css, look for unused selectors
Now, open the style.css file in your child theme. This file is where a lot of your website’s styling rules live. As you scroll through it, look for things that seem out of place or are clearly not being used. These are often called “selectors.” For example, you might see code for a button style that your website doesn’t actually use anywhere.
Step 3: Use browser’s Inspect Tool → Compare against site layout
This is where your web browser becomes your best friend. Most modern browsers, like Google Chrome, have a tool called “Inspect” or “Developer Tools.” You can usually right-click anywhere on your website and choose “Inspect.” This tool lets you see the code that makes up your page right in front of you. You can then compare the CSS you see in your style.css file with what’s actually being used on your live website. If you see a style in your file but can’t find it being used on your page, there’s a good chance it’s unused.
Step 4: Remove unnecessary selectors and test responsiveness
Once you’ve identified some unused styles, you can carefully remove them from your child theme’s style.css file. After you remove something, always, always, always check your website to make sure nothing broke. Look at different pages and, importantly, check how your website looks on different screen sizes (like on a phone or tablet) to make sure everything still works well. This step is crucial to successfully remove unused CSS in WordPress.
✅ Pro Tip: Always keep a backup of the original file before you make any changes. Just in case you accidentally remove something important, you can easily go back to how it was.
Method 2 – Using Chrome DevTools to Detect Unused CSS
This method is a bit more high-tech than the manual audit, but it’s incredibly powerful and surprisingly easy to use. Chrome DevTools can actually show you exactly how much of your CSS is being used and how much isn’t.
Step 1: Open the page in Chrome
First, open the page on your website that you want to check in the Google Chrome browser.
Step 2: Right-click → Inspect → Coverage tab
Now, right-click anywhere on the page. A menu will pop up. Choose “Inspect.” This will open the Chrome DevTools panel. Inside this panel, look for a tab called “Coverage.” If you don’t see it right away, you might need to click on the three dots (more options) or the arrow next to other tabs to find it.
Step 3: Reload page → See % of unused CSS per file
Once you’re in the “Coverage” tab, you’ll see a little circle with an arrow or a refresh icon. Click that to reload the page. As the page reloads, the “Coverage” tab will start showing you a list of your CSS files. Next to each file, you’ll see a percentage. This percentage tells you how much of that specific CSS file is not being used on the page you’re viewing. It’s truly amazing to see how much CSS you can remove unused CSS in WordPress from.
Step 4: Note down file names with red blocks (high % unused)
Files with a high percentage of unused CSS will often have a red bar or block next to them. This is your cue! These are the files you want to focus on. Write down their names, because these are the files where you’ll likely find a lot of code that isn’t pulling its weight.
✅ Tools like UnusedCSS.com or PurifyCSS can also help if you want to automate some of this detection, although our goal here is to do it without extra plugins. These online tools can analyze your website and tell you which CSS is unused, giving you a list you can then apply manually.
Method 3 – Remove Unused CSS in Theme Files
Now that you’ve identified the files with too much unused CSS, it’s time to go into your theme files and make some smart changes. Remember, always work in your child theme!
Step 1: Access /wp-content/themes/yourtheme/
You’ll need to access your website’s files. You can do this using an FTP program (like FileZilla) or through the File Manager in your web hosting control panel (like cPanel). Navigate to the wp-content folder, then to the themes folder, and finally, into your child theme’s folder. It’ll probably be named something like yourtheme-child.
Step 2: Edit style.css, functions.php, or enqueue files
Inside your child theme folder, you’ll be looking for style.css (which we discussed), functions.php, or other files where CSS might be “enqueued” (which means told to load) or directly written.
style.css: This is where you manually remove the unused selectors you found in Method 1 and 2.functions.php: This file is more advanced. Sometimes, themes or plugins load CSS files here using a special WordPress function calledwp_enqueue_style(). You might find lines of code that tell WordPress to load an entire CSS file, even if only a small part of it is used.
Step 3: Remove/optimize unused @import or custom CSS
Sometimes, one CSS file will tell your browser to load another CSS file using @import. If the imported file is largely unused, or if you only need a small part of it, you might be able to remove the @import line and instead copy only the necessary CSS directly into your style.css file. Also, look for any custom CSS you might have added yourself that isn’t being used anymore. This is a key step to effectively remove unused CSS in WordPress.
Step 4: Use conditional loading with wp_enqueue_style() to load styles only where needed
This is a more advanced but very powerful technique. Instead of loading a big CSS file on every page, you can use wp_enqueue_style() with some extra code to tell WordPress to only load certain CSS files on specific pages where they are actually needed. For example, if you have a special style for your contact page, you can set it up so that CSS file only loads when someone visits the contact page, and not on your homepage. This is a fantastic way to remove unused CSS in WordPress by preventing it from loading in the first place.
Advanced Tip – Delay or Defer Non-Critical CSS
Even after you remove unused CSS in WordPress, some CSS might still be needed but not right away. Think of it like unpacking groceries: you need to get the milk and bread out first, but the can of beans can wait a minute. Similarly, “critical CSS” is the styling needed for the very first part of your website that a visitor sees (the “above-the-fold” content). Other CSS can be loaded a little later.
- Add inline critical CSS for above-the-fold content: You can take the super-important CSS that makes your header and the very top of your page look good and put it directly into the HTML of your page. This makes sure those crucial styles are loaded immediately, making your page feel fast.
- Use
rel="preload"ormedia="print"trick to delay loading: For CSS that’s not critical right away, you can use special HTML attributes likerel="preload"to tell the browser to download the CSS in the background, but not apply it immediately. Another clever trick is to usemedia="print"(which tells the browser the CSS is only for printing) and then change it tomedia="all"with a little bit of JavaScript after the page has loaded. This makes sure the non-critical CSS doesn’t block the initial page display. - Async CSS loading via
loadCSS()method for advanced users: For those comfortable with more technical details, theloadCSS()method is a JavaScript snippet that allows you to load CSS files asynchronously. This means the browser can continue doing other things while the CSS loads, further improving perceived page speed.
Common Mistakes to Avoid
When you’re trying to remove unused CSS in WordPress, it’s easy to make a few slip-ups. Here are some common mistakes to watch out for:
- Removing framework CSS (Bootstrap, Elementor) without testing: Many themes and plugins use large CSS frameworks like Bootstrap or Elementor. These frameworks have tons of styles. Don’t just blindly delete parts of them. If you remove something essential, your site’s layout can break completely. Always test thoroughly after any changes.
- Editing parent theme instead of child theme: We’ve said it before, but it’s worth repeating: always, always, always work in your child theme. If you edit your main (parent) theme directly, all your hard work will be erased the next time the theme updates.
- Not clearing cache after changes: After you make changes to your CSS files, your website might still show the old version because of caching. Caching stores a temporary copy of your website to make it load faster for repeat visitors. You need to clear your website’s cache (using your caching plugin or hosting provider’s tools) and your browser’s cache to see the changes you’ve made.
- Ignoring mobile responsiveness: Just because your site looks good on a big computer screen after you remove unused CSS in WordPress doesn’t mean it looks good on a phone. Always check your website on different devices and screen sizes to make sure everything is still working and looking great.
FAQs About Removing Unused CSS
Here are some common questions people ask about this topic:
Does removing unused CSS improve SEO?
Yes, absolutely! Page speed is a direct ranking factor for Google, especially through something called Core Web Vitals. When you remove unused CSS in WordPress, your website loads faster, which makes Google happy and can help your site rank higher in search results.
Can I use a plugin for this?
Yes, you can. There are plugins designed to help with this. However, as we discussed, doing it manually is often cleaner and can lead to a faster website in the long run because you’re not adding another plugin’s code to your site.
What if I break my site?
This is a common fear! The best way to avoid this is to always keep backups before you start editing any files. If something goes wrong, you can simply restore your website to how it was before you made the changes.
Is this safe for beginners?
Absolutely! While it might seem a bit technical at first, if you follow this guide step-by-step, especially by using a child theme and making backups, it’s a very safe process. Start with the Chrome DevTools method to identify the unused CSS, and then slowly and carefully try to remove unused CSS in WordPress manually.
Final Thoughts – Is It Worth It?
Taking the time to remove unused CSS in WordPress is, without a doubt, a powerful way to make your website load much, much faster. It’s a bit like spring cleaning for your website – getting rid of the clutter allows everything else to run more smoothly. This is especially great for passing Google’s important performance benchmarks, which means your site will be more visible to potential visitors.
Even if you’re just starting out, you can begin by using the Chrome DevTools method to see where your website is carrying extra weight. As you get more comfortable, you can move on to cleaning up your theme files directly. We recommend reviewing your CSS every six months or after any major changes to your theme or website. It’s an ongoing process that truly pays off in a faster, more efficient, and better-ranking website.

Do Subscribe the Newsletter and Push Notification Because we'll share premium knowledge about web here for free.